Setting culling
In Kanzi render passes you can optimize the performance of meshes in your applications by setting the culling properties.
Setting the cull mode
By default Kanzi culls in 3D content the polygons whose normal points away from the active camera. To override this, you can set the cull mode in a Pipeline State Render Pass.
To set the cull mode:
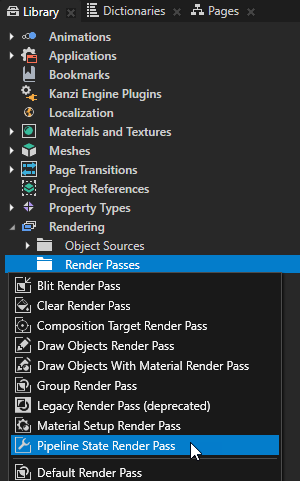
- In the Library > Rendering > Render Passes press Alt and right-click and select Pipeline State Render Pass, or select an existing Pipeline State Render Pass. See Render passes.
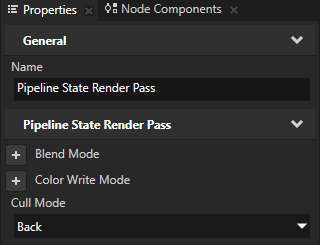
- In the Properties set the Cull Mode property to:
- Back to make Kanzi not render the polygons whose normal points away from the active camera
This is the default value for the Cull Mode property.
If you do not set the Cull Mode property in a Pipeline State Render Pass, Kanzi uses the value for the property set in the nearest parent Pipeline State Render Pass. If there is no parent Pipeline State Render Pass, Kanzi uses the default value. - Front to make Kanzi not render the polygons whose normal points towards the active camera
- None to disable culling
- In the Pipeline State Render Pass create a Clear Render Pass and the Draw Objects Render Pass that you use to draw the nodes you want to cull.
You can use filters to collect specific nodes for rendering. See Filters.
- Take into use the render passes you created:
- In the Project select the Scene or Viewport 2D node which contains the content you want to render.
- In the Properties set the Render Pass property to the topmost render pass in the render pass tree which contains the Pipeline State Render Pass you created.
Controlling frustum culling
Use frustum culling when you have a lot of meshes outside of the view frustum of the camera. The view frustum is the volume visible to the active camera and contains the nodes whose bounding volume clips the view frustum. Frustum culling enables you to trade GPU time spent culling the meshes for CPU time.
To control frustum culling:
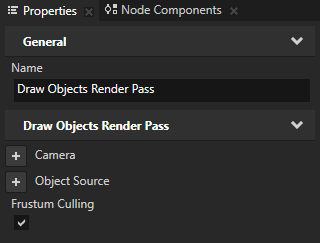
- In the Library select the Draw Objects Render Pass you use to render the meshes for which you want to set frustum culling. See Rendering.
- In the Properties add and enable the Frustum Culling property.
This way Kanzi does not render the meshes when they are outside of the view frustum.
- (Optional) In the Project select the nodes that contain the meshes for which you want to set frustum culling, in the Properties click
 , add the Frustum Cull Margin property, and set it to the amount of space around the node you do not want to cull.
For example, this is useful when a vertex shader radically modifies the geometry of nodes, such as in vertex skinned nodes.

To see if your frustum culling setting works as you intended it to work, in the Preview click  to enter the Analyze mode, right-click
  , select the Performance HUD, and move the camera away from the node for which you want to control culling. When culling does not occur anymore for the node, the Batch Count value drops.
See also
Rendering
Filters
Reducing the number of rendered vertices
Setting the correct size of vertex cache
Loading resources in parallel
Troubleshooting the performance of your application
Best practices

Open topic with navigation